substrate, enclosure & decor
as they are detritivores, isopods thrive best in soil with plenty of nutritious food for them. this means that rotting wood, fallen leaves (often referred to as leaf litter) and other things naturally found on the forest floor are best for them. never use pine or cypress wood as they have natural insecticides in their sap which may be harmful to isopods. to provide these nutrients to them, many find flake-soil (which can be bought or made; here is a recipe) to work for them, but i prefer organic compost or top soil or potting mix, and then i manually add in leaf litter and rotting wood. check the ingredients list over to ensure that no chemicals have been added. calcium is fine if it has been added. i am crosschecking gypsum at the moment to ensure it is safe for my pods (abbreviation for isopods).
i prefer to start with a 5.5-6L (6qt) plastic container, as this is small enough that starting/founding colonies can find each other and breed, and large enough that an upgrade won't be necessary for some time (species-dependent). add a hole/a number of holes one across from the other on one side of the enclosure. this should be close to the top of the substrate if holes are not already present (such as in plastic shoeboxes) by using scissors heated over a flame and cover said holes with fine mesh or chiffon or anything that will allow air through but not the isopods or their mancae (baby isopods). fill it (according to how deep your species likes to burrow) with substrate (usually 1-2.5 inches is fine).
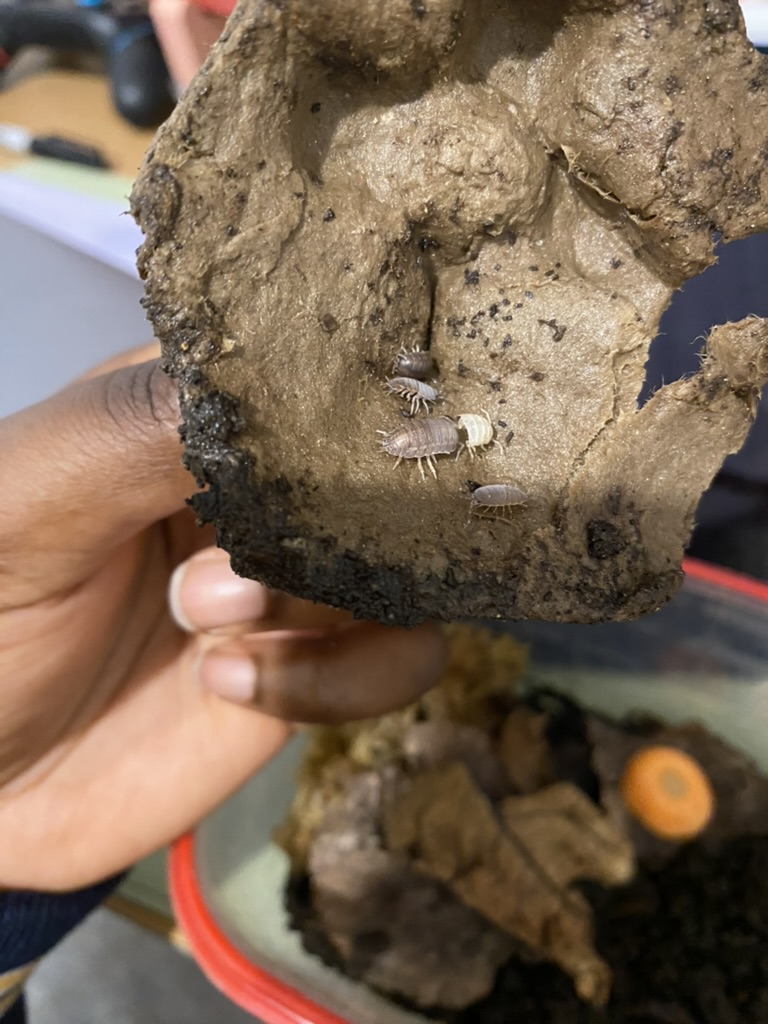
for decor, i generally include a piece of cork bark and an egg carton 'hump' as hides (places where isopods will gather and well... hide) as well as lots of leaf litter to allow for extra nutrition but also for further ground cover. add some sphagnum moss to one side of the enclosure (the side without the holes) and soak the moss with dechlorinated water (such as filter water that has been tested for no chlorine or water that ha been dechlorinated by you - dechlorinator can be bought from any store that sells fish). this will be your wet area. you're ready for isopods to enter now!
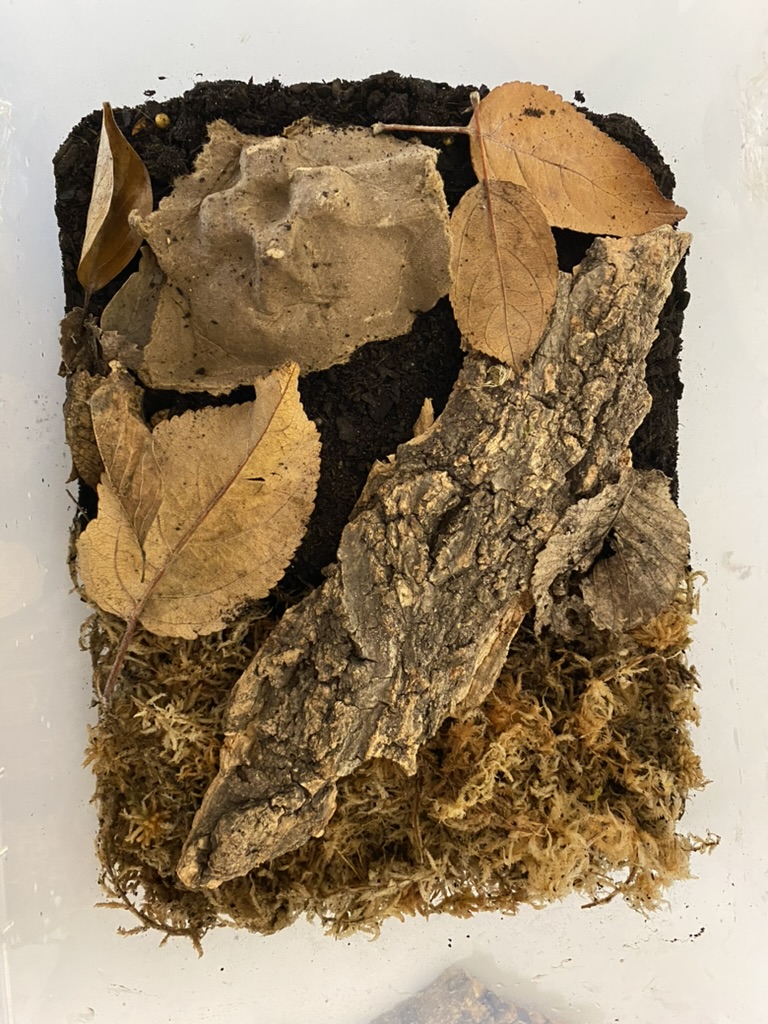
my enclosure
supplemental food
isopods need 2 things out of their supplemental food (as in, outside of the substrate). these are protein and calcium. without either, your isopods will likely cannibalise each other (note: this is not eating dead bodies - isopods don't let anything go to waste. i mean that they will kill and eat each other without protein and calcium) to gain the necessary nutrients. calcium is necessary as isopods shed their exoskeleton and need the calcium to build up new layers. calcium can be provided through ground/crushed egg shells or straight-up calcium powder (i don't use cuttlebone as it is unsustainable). protein is a little more difficult. there are many places that sell supplemental food for isopods, but as buying this constantly can get expensive, i prefer to feed fish flakes/pellets (with actual fish, not fish meal) and freeze dried shrimp, mealworms or crickets(some feed bits of chicken but i haven't tested this. others have to great success). vegetables can also be fed more for fun than nutrition but avoid fruits as they can attract fruit flies.
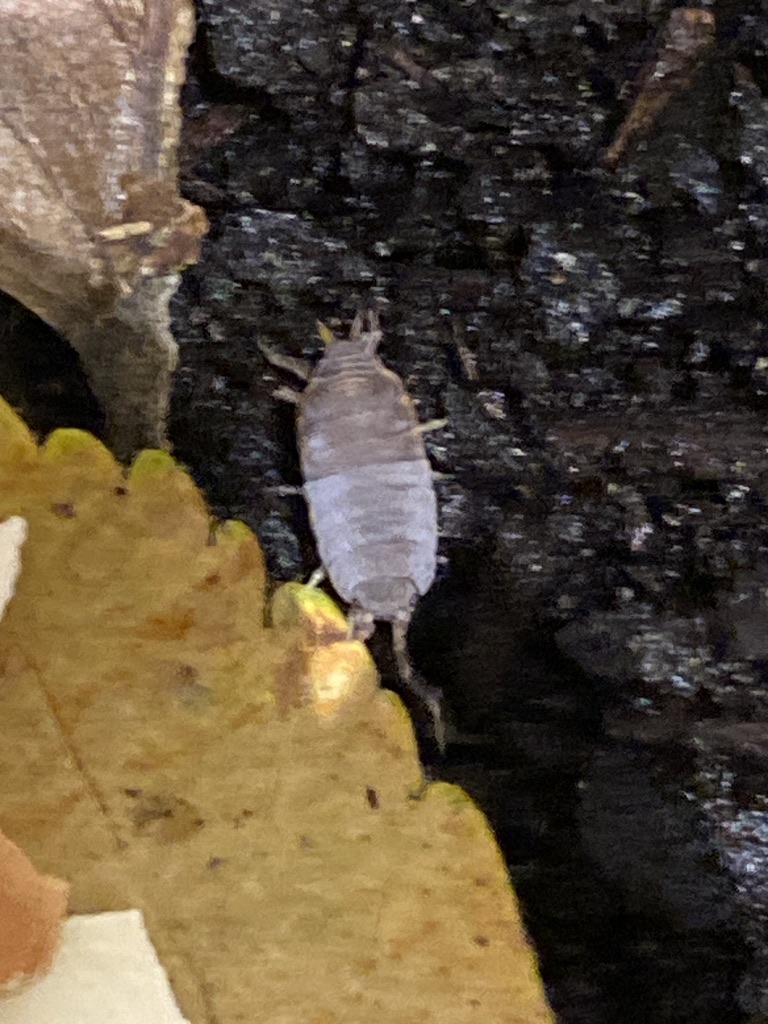
an isopod with its shed
pests
some common pests include fungas gnats, mites, mold, unwanted isopods (like dwarf whites or porcellionides pruinosus) and sometimes ants. these problems can be easily mitigated by boiling, drying in the oven, or freezing anything that you plan to bring into your enclosure. i freeze my leaves and bark for 72 hours even if i buy them, as i don't want any problems. soil collected from outside should be sterlised through baking (though this stinks) or steaming (put a lid on top to contain the smell) for 30 minutes on high heat. ensure the water doesn't run out. wikihow has a pretty good article on this. to prevent against mites, if wild-catching your isopods, check their legs and stomachs for little dots that are white, black or brown. also, for fungus gnats, mix mosquito bits into your dechlorinated water to stop the larvae (not at all harmful for isopods) and put sticky paper on your isopod bins (containers) to catch the adults. make sure you never leave an open container unattended, as flying and crawling insects (or crustaceans - unwanted isopods can be a problem too!) can get in and make themselves your problem.
note: i have significantly less experience with pests as i have not encountered some. take my words with a grain of salt and do other research too.
maintenance
to ensure your isopods live happy lives, maintenance should be planned and scheduled in on a weekly, monthly and sometimes, daily basis. cork bark/other bark should be changed once it has been significantly chewed down. isopod frass (poop) can be difficult to distinguish from soil, but aim to change out your substrate every 6 months for small-medium colonies and every 3 months for large colonies. leaf litter should be regularly added back in as it is eaten down. your sphagnum moss should be constantly wet as otherwise your isopods will suffocate as their gills dry out. a moisture gradient from the sphagnum moss to the soil is very important. add supplemental food every 2 or so days, but only as much as they eat in a day, to avoid mold. when i advise keeping a logbook to note all of these changes and your maintenance schedule.
breeding morphs & genetics & commonly kept species
for this section i will be ignoring cubaris, as i don't keep them and don't know quite how their genetics work. if you passed year 10 biology, the concept of isopod genetics won't be too difficult. essentially, the dominant genes of isopods are called the wild types. these are the ones that occur naturally in nature and are often brown/grey but can be different, depending on if they are mimicking another species. put simply, to get new morphs, isopod keepers isolate any mutations (aka, isopods that aren't wild type/don't have the dominant genes of the population). i will be calling these visually presenting isopods. if all the VP isopods are male (isopod sexing tips are down below), add in at least 1 but up to 3 wild-type or dominant gene females. this is generation 0 (G0). G1 will all be heterozygous, and will be wild type presenting. remove the adult females once they have given birth, isolate the juveniles, and breed G1. G2 will be approximate 75% wild type and 25% VP isopods. remove these VP isopods and call this G3. breed again for at least 3 more generations by isolating and breeding, and once you reach 3 generations with no wild types, you have isolated a new morph. congrats! if you have all females that have the mutation gene, isolate the females as juveniles or adults and wait for them to give birth. this new set of mancae will be your G1. isolate and follow the above steps and explanation. if you have a mix (which will hopefully happen), isolate all the VPs and breed. you will be at G3 once these isolated VPs give birth.
while having a cool morph is far more exciting than some of the more commonly kept species, they often tend to be pricier, and a little harder to take care of for a first species. it's advised that you keep porcellio laevis, porcellio scaber, armadillidium vulgare or porcellionides pruinosus first, depending on your interests. all four species have interesting morphs, one of which is down below. porcellio laevis, or 'the swift woodlouse' and porcellio scaber, or 'the common rough woodlouse' are fast and quick to breed, same with porcellionides pruinosus, whose wild-type is known as both 'powder blue' and 'powder orange' owing to their colouration, but porcellionides pruinosus are smaller than either of the two porcellio species. armadillidium vulgare, or 'the pillbug' is a commonly known species worldwide. all four species can be found in your backyard on wet days under rotting logs, stones, pots or anywhere where there's moist soil.


- porcellionides pruinosus
- isopod anatomy
- a gravid (pregnant) female isopod